Using AmneziaWG 2.0 Protocol on Self-Hosted Servers
Overview
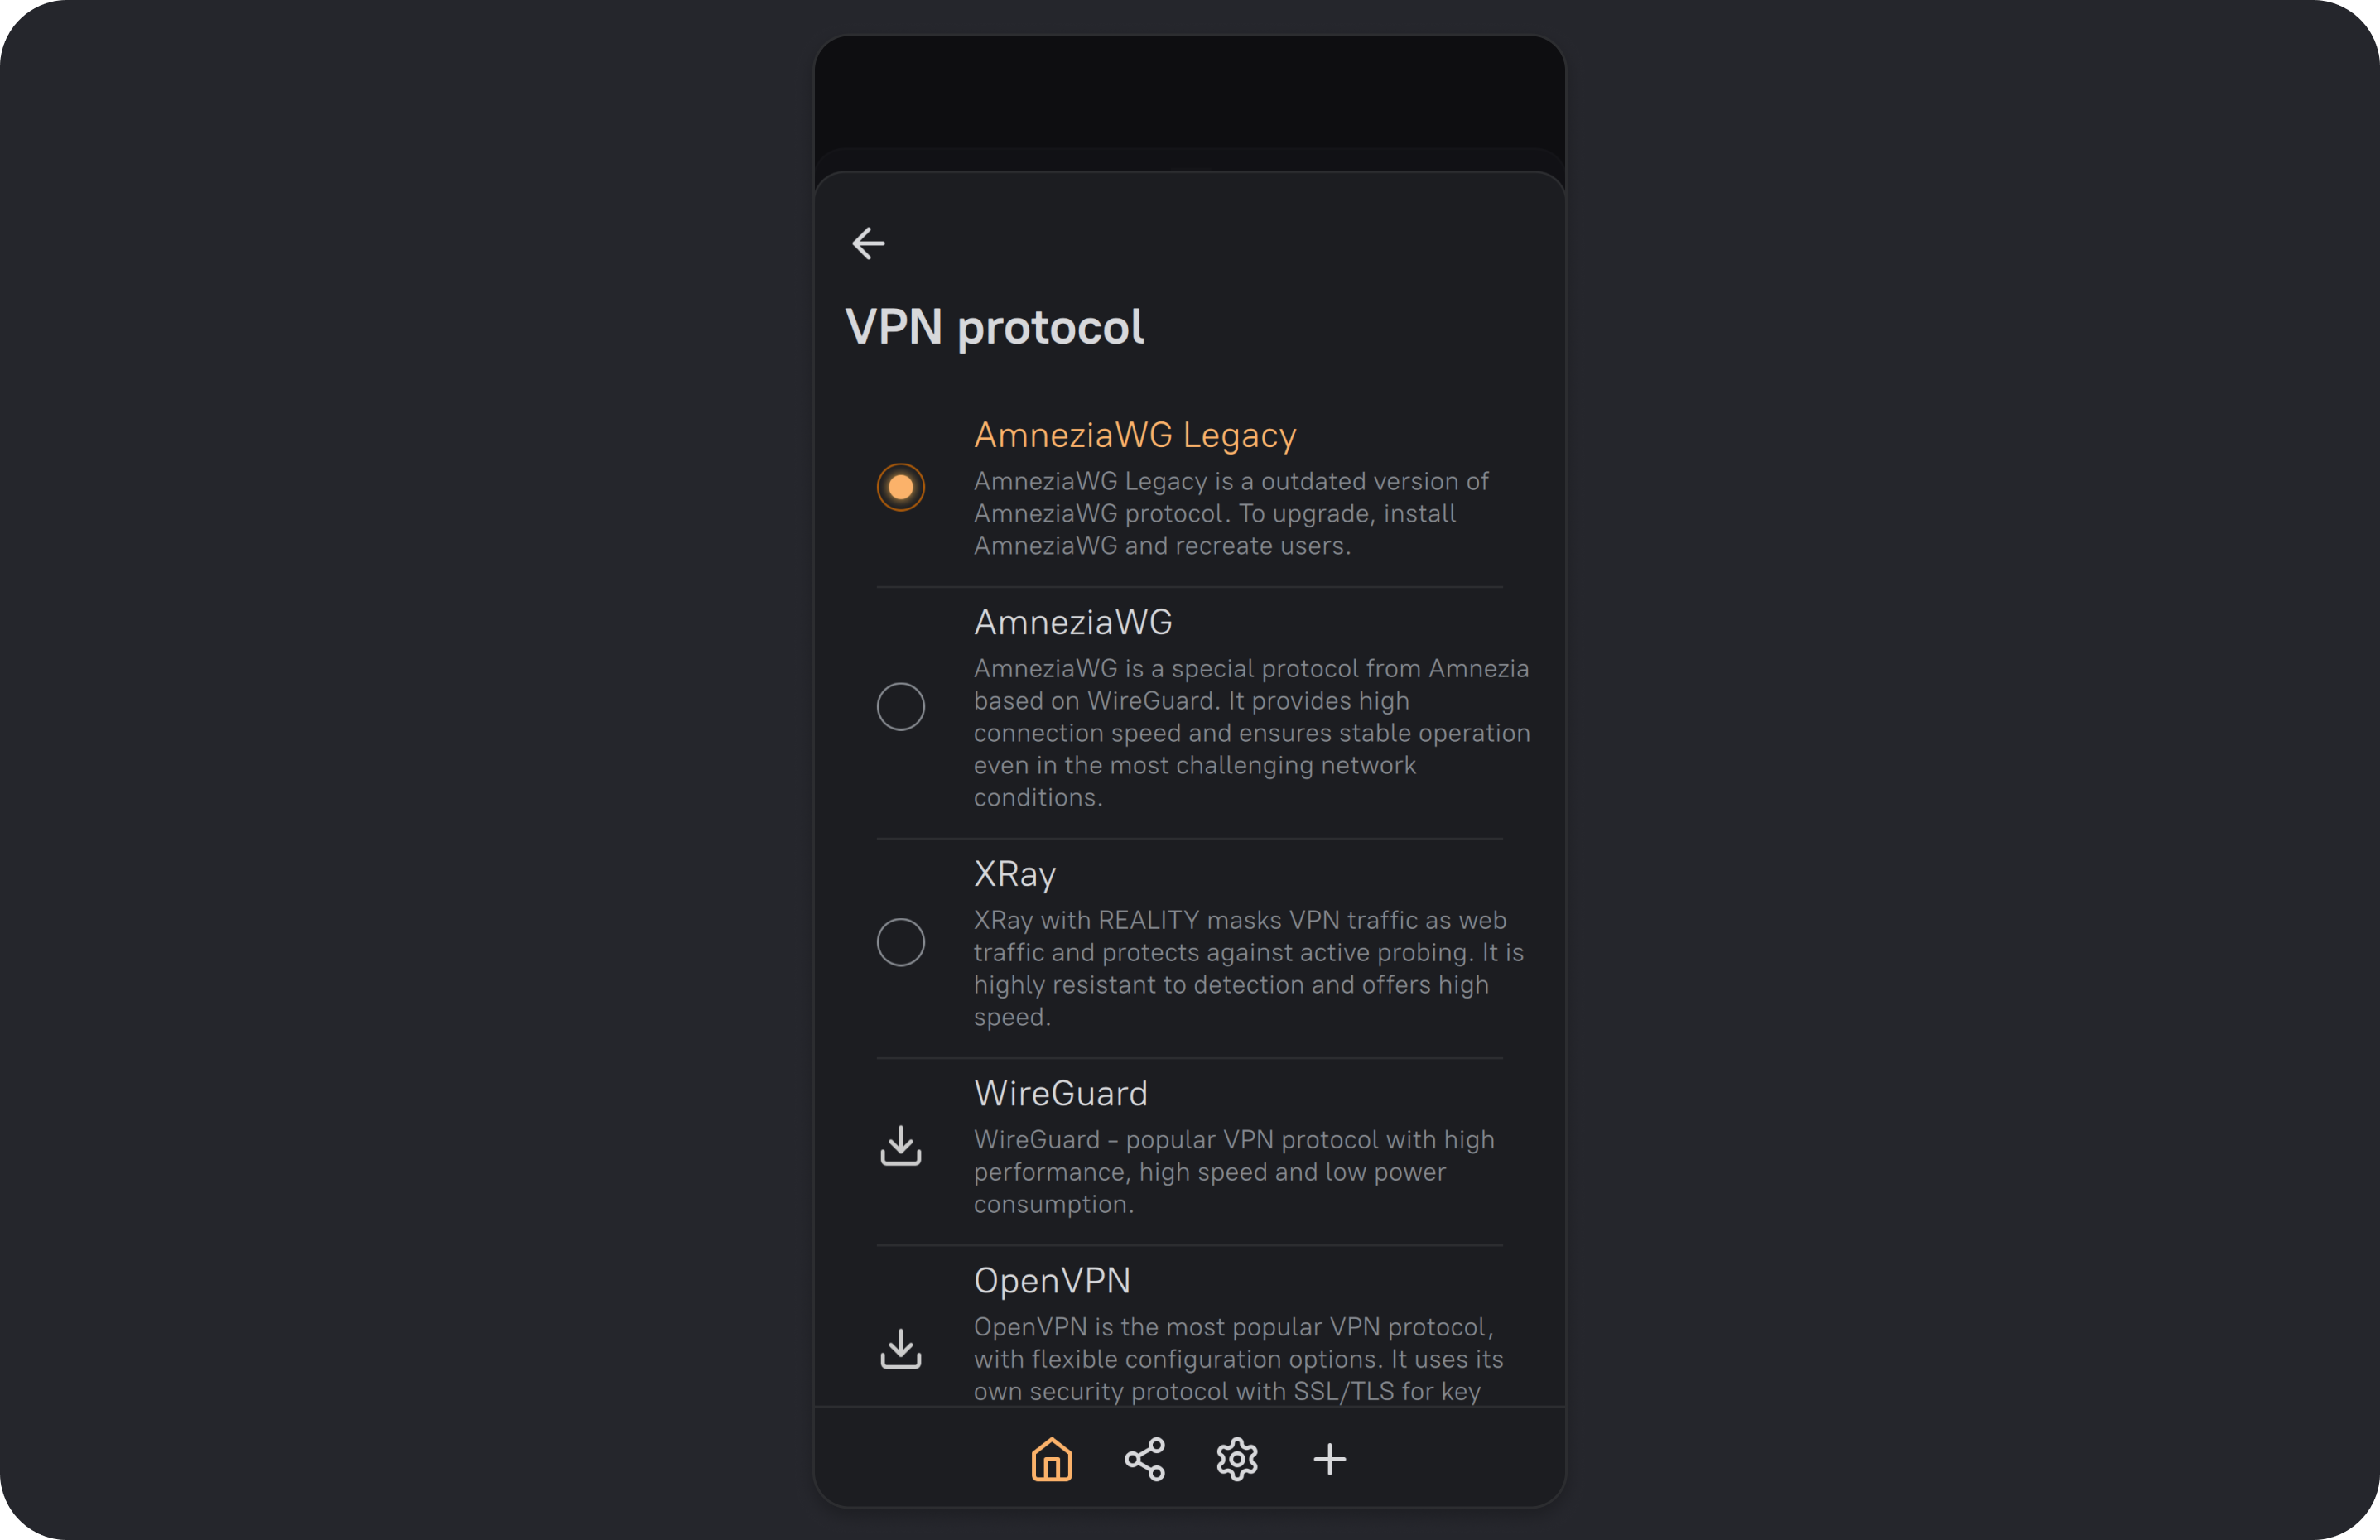
The new AmneziaWG 2.0 protocol can disguise VPN traffic as common network protocols (for example, QUIC, DNS, and others). This makes VPN connections harder to detect and block by Deep Packet Inspection (DPI) systems.
The AmneziaWG 2.0 protocol is supported in the AmneziaVPN app version 4.8.12.9 and later. In most cases, no additional server-side steps are required — most servers are already compatible. See: VPS requirements.
Starting from AmneziaVPN 4.8.12.9, an existing AmneziaWG version 1.0 protocol installation on the server is shown as AmneziaWG Legacy.
Key changes in the AmneziaWG 2.0 protocol compared to 1.5:
- added parameters
S3andS4 - added range support for
H1–H4: values are now chosen randomly and should not overlap - removed parameters
j1-j3anditime, as they were deemed redundant
Note: compared to the AmneziaWG 1.0 protocol, AmneziaWG 1.5 introduced the I1-I5 parameters, which are also used in the AmneziaWG 2.0 protocol.
Install the AmneziaWG 2.0 Protocol
To connect using the AmneziaWG 2.0 protocol, install it on your server:
- Update AmneziaVPN to 4.8.12.9 or later from the downloads page (mirror).
- Open the AmneziaVPN app and click any connection name.
- Click ⚙️ (gear icon) to the right of your server connection to open the list of available protocols.
- Click the 📥 icon next to the AmneziaWG protocol, then click Install.
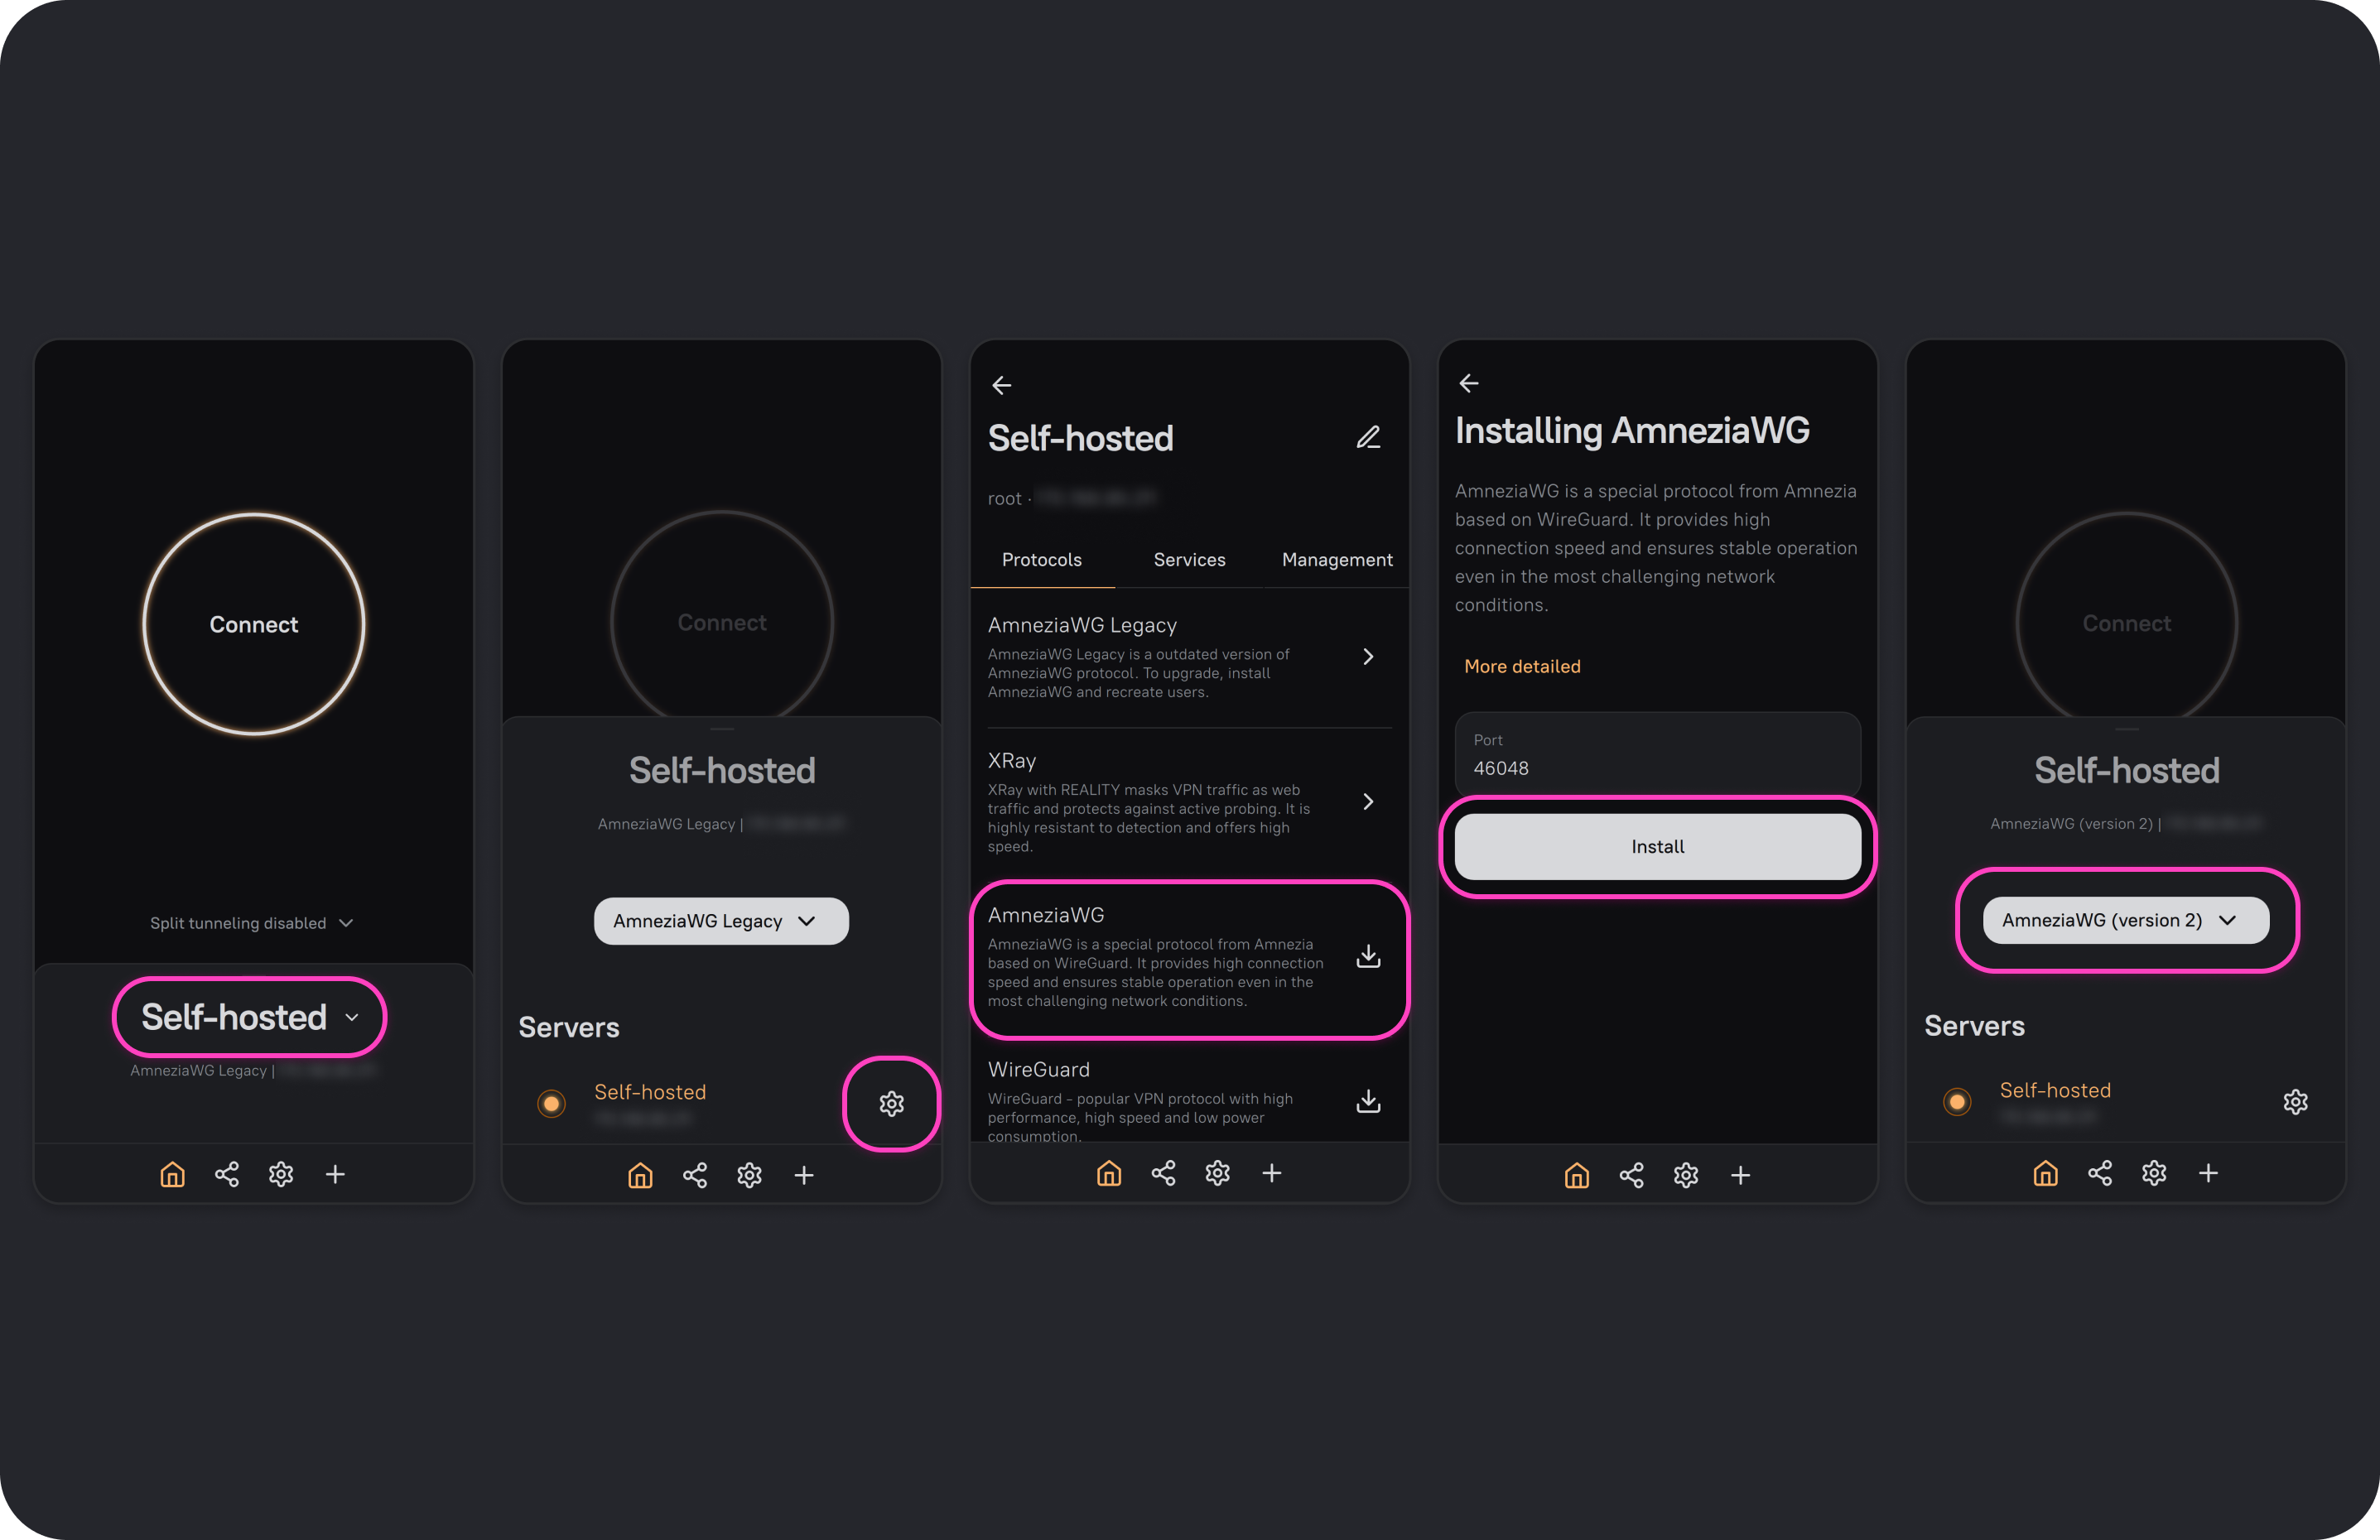
After installation, the AmneziaWG 2.0 protocol will be available in the connection settings — you can connect immediately and share VPN access using the new protocol.
AmneziaWG is installed with a random port by default. Some ISPs block UDP traffic on high ports, so we recommend changing the port immediately to any number up to 9999, for example 585 or 1234. Make sure the port is not already used by another service on the server.
For full diagnostics (network checks, I values, and ports), see Self-Hosted Connection via the AmneziaWG Protocol Does Not Work.
FAQ
Do I need to generate new configuration files/keys to connect using the AmneziaWG 2.0 protocol?
Yes.
In AmneziaVPN 4.8.12.9 and later, an existing AmneziaWG 1.0 protocol installation on the server will be shown as AmneziaWG Legacy, with its own configuration files and keys that will continue to work. When you install the AmneziaWG protocol, version 2.0 is used by default — this is a different protocol, and you’ll need to generate new guest configuration files/keys to connect.
Can I upgrade an existing AmneziaWG 1.0 connection to version 2.0?
No.
You’ll need to generate a new configuration file or key for the new protocol.
Can I connect using the AmneziaWG 2.0 protocol in an older version of AmneziaVPN?
No.
If you create a guest connection for the AmneziaWG 2.0 protocol in AmneziaVPN versions earlier than 4.8.12.9, it won’t work — under the connection name, the app shows Not installed. If you create a full-access connection in an older version of AmneziaVPN, the AmneziaWG 2.0 protocol won’t be shown even if it’s installed on the server.
Using the AmneziaWG 1.5 Protocol If the AmneziaWG 2.0 Protocol Is Unavailable
If you can’t update to AmneziaVPN 4.8.12.9 or later, and the AmneziaWG 1.0 protocol is installed on your server, you can improve its resistance to blocking by setting the I1 parameter on the devices that connect to the server via the AmneziaWG 1.0 protocol.
How to Configure
-
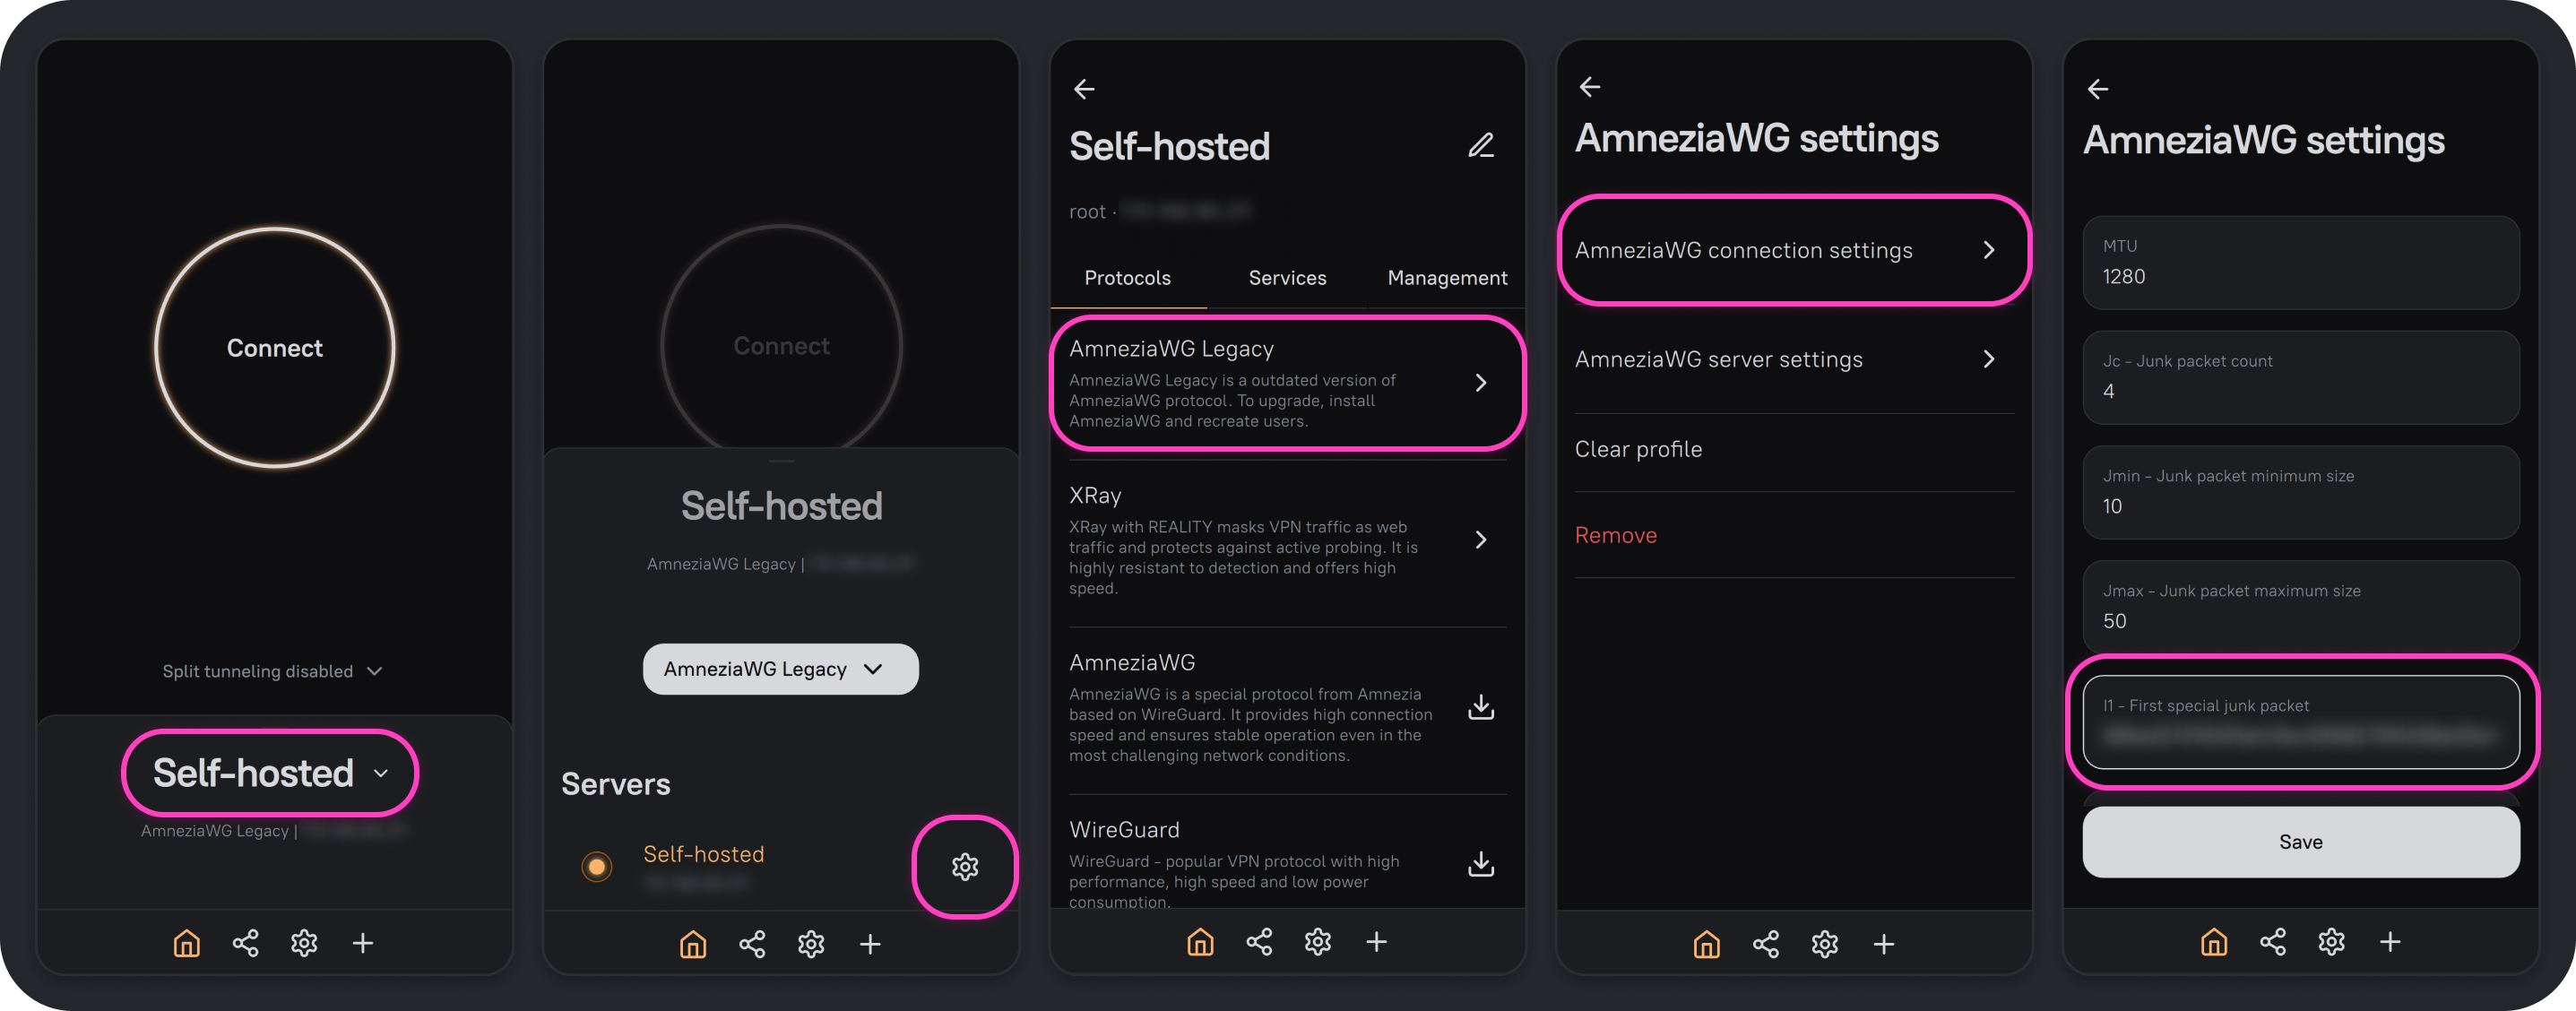
Open the AmneziaVPN app and click any connection name.
-
Click ⚙️ (gear icon) to the right of your server connection.
-
From the list of installed protocols, select AmneziaWG Legacy (or AmneziaWG, depending on which protocol version you’re configuring), then open AmneziaWG connection settings.
-
Find the field I1 - First special junk packet and paste the following obfuscation packet:
<r 2><b 0x8580000100010000000004796162730679616e6465780272750000010001c00c000100010000026d000457fa27d1> -
Click the Save button to apply the settings.
This device will now connect to the VPN server with traffic obfuscated to look like DNS.
How to Extract a Protocol Signature for AmneziaWG Manually
This section will guide you through the process of manually finding and extracting a network protocol signature to use with the AmneziaWG protocol.
You will need Wireshark app, which can be downloaded from the official website.
Preparation
-
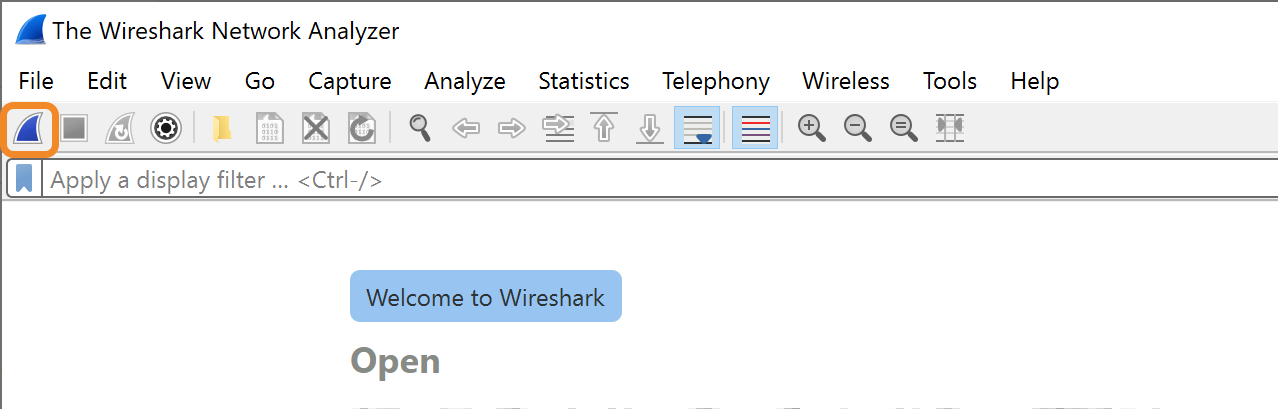
Install and launch Wireshark.
-
In the Wireshark main window, select the network interface currently handling your internet traffic.
-
Click the Start capturing packets button to begin capturing network traffic.
Finding a Protocol Signature (Using QUIC as an Example)
Let's illustrate how to find a signature using the popular UDP-based QUIC protocol as an example:
-
After starting packet capture, enter the name of the desired protocol (e.g.,
quic) into the Wireshark filter field.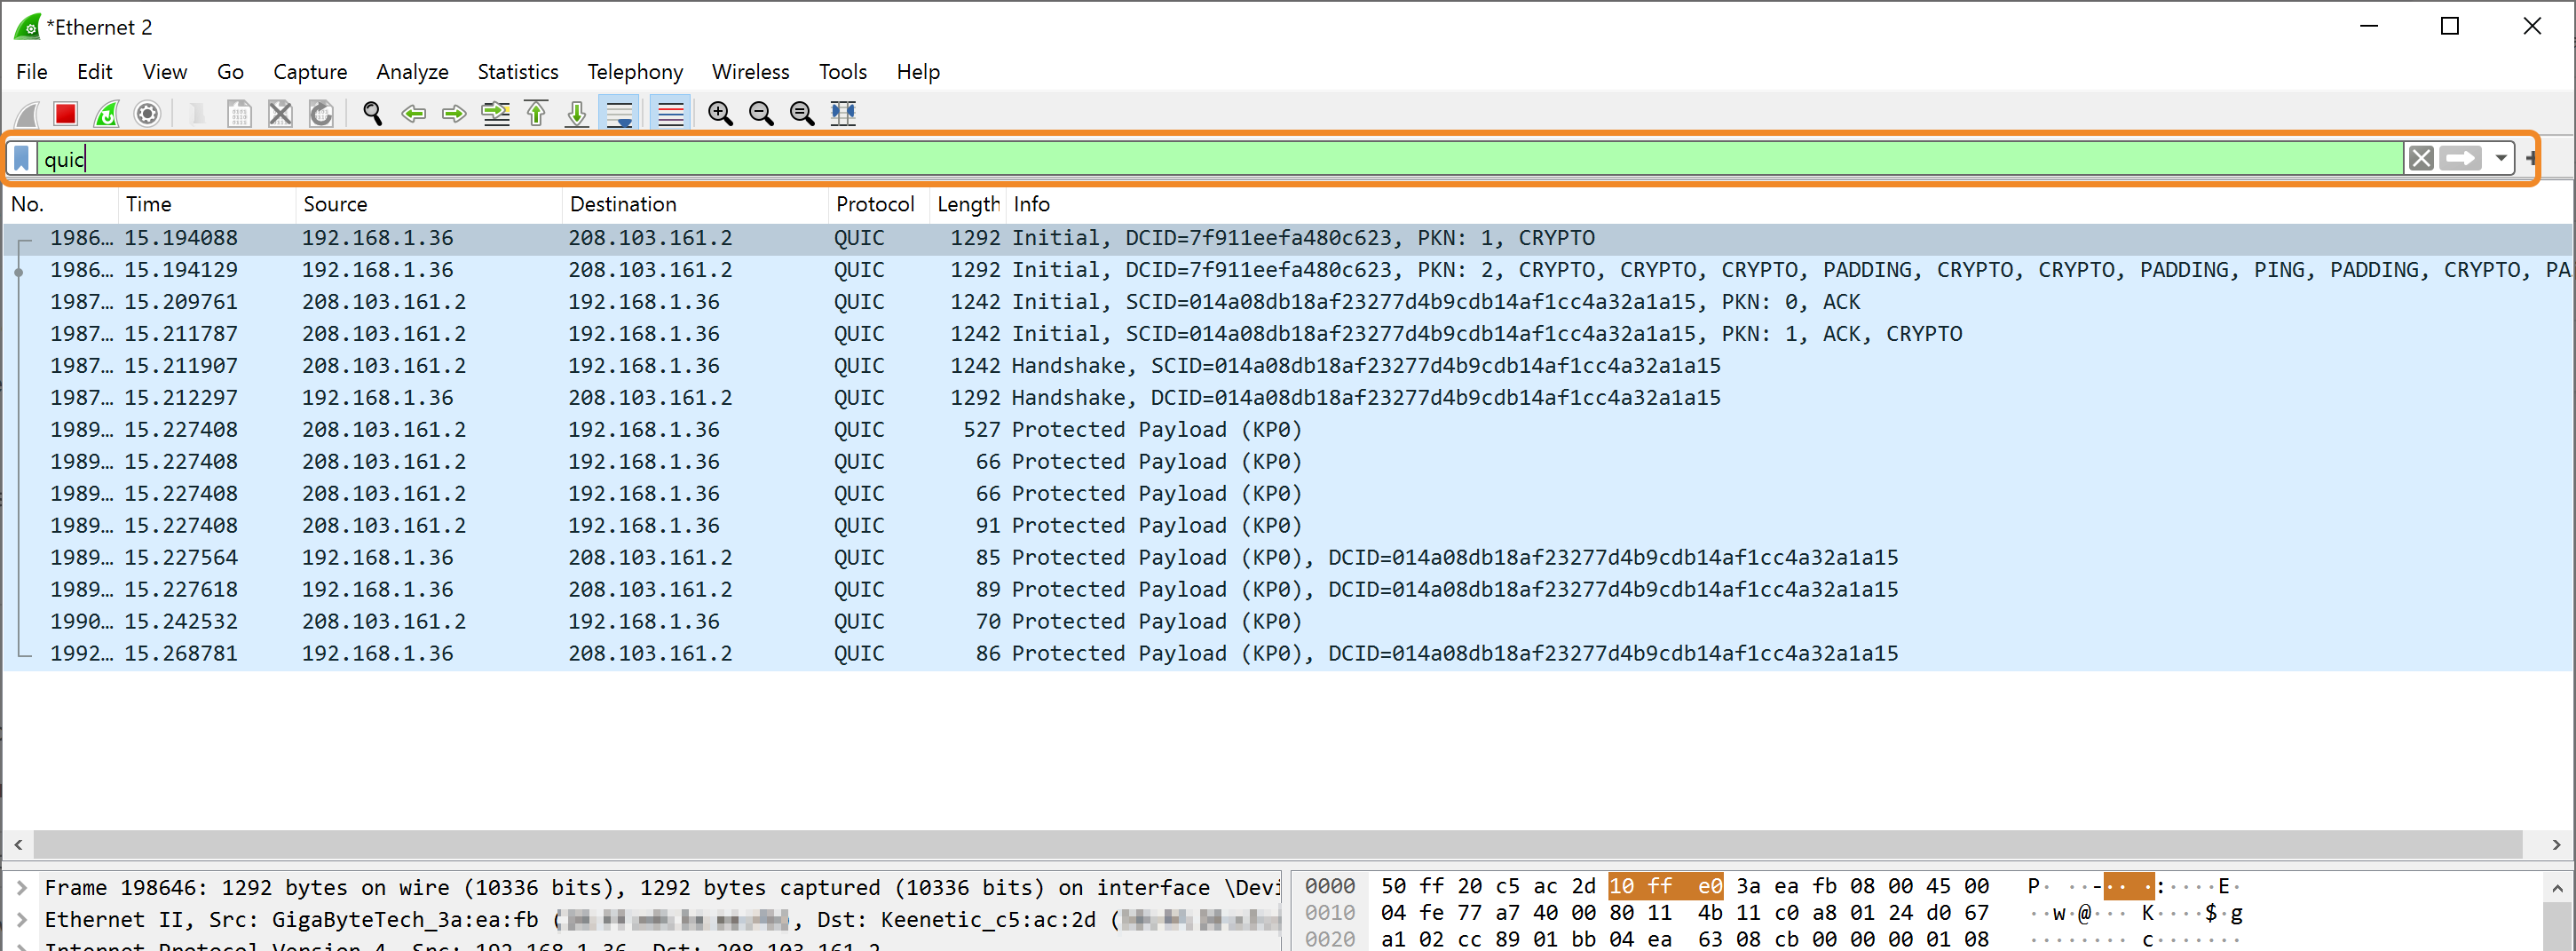
If you haven't yet selected a specific protocol and want to explore available UDP protocols, simply type
udpinto the filter field. -
From the list of captured packets, select the packet you want to use for obfuscation.
Tip:
It's recommended to select initial or final packets from a session, as they tend to be most effective for masking VPN traffic. -
Right-click on the selected packet and choose Copy → …as Hex Stream.
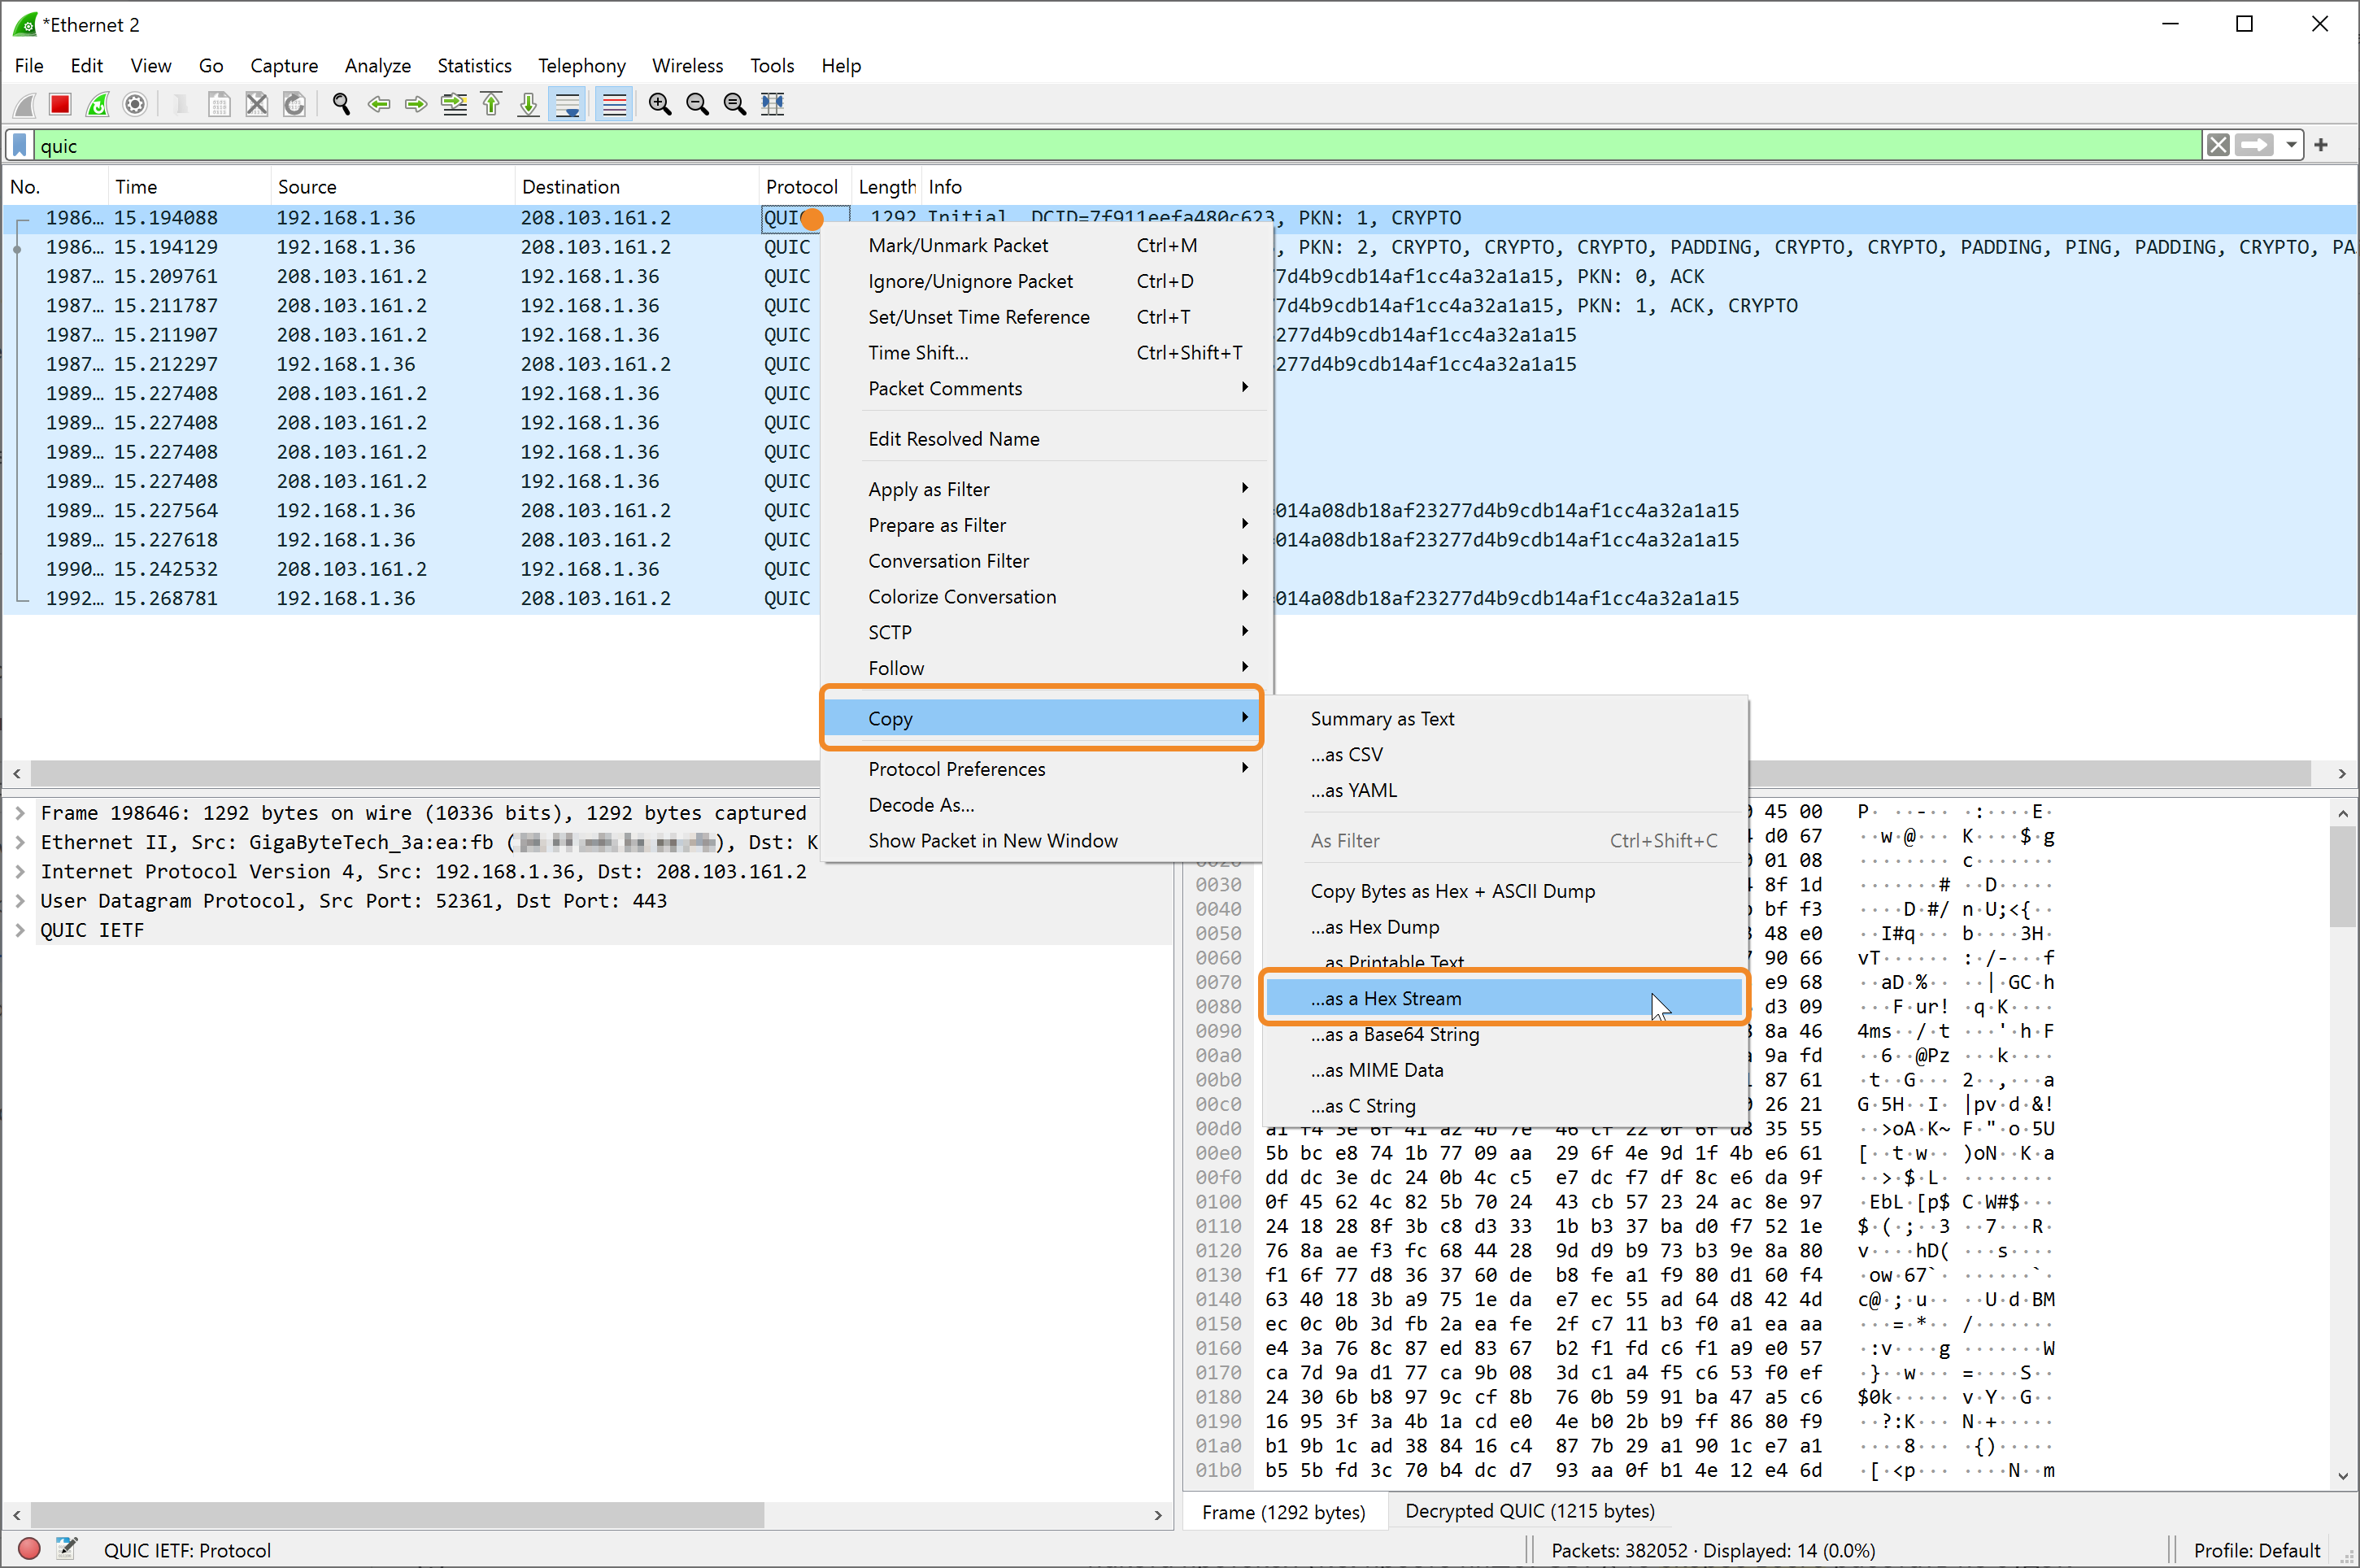
You'll end up with a HEX-formatted string like this:
d10000000108c10f0131a077e7f01087...
How to Prepare a HEX String for Use in AmneziaVPN
After copying the hex string from Wireshark, you need to format it properly to be compatible with AmneziaWG protocol parameters.
To format the hex string correctly, do the following:
- Add the prefix
<b(with a space) before the string. - Add the prefix
0ximmediately before the hex string. - End the string with a closing character
>.
Thus, the original hex string: d10000000108c10f0131a077e7f01087...
should look like this: <b 0xd10000000108c10f0131a077e7f01087...>
Format Explanation:
<b ...> — indicates that this is a special binary data packet.
0x — specifies that the following characters represent hexadecimal (hex) data.
How to Configure AmneziaVPN
Use the formatted string to change the I1-I5 parameters on either the server or the client, depending on which AmneziaWG protocol version you use.
If the server uses the AmneziaWG 1.0 protocol (shown as AmneziaWG Legacy), you can only change I1-I5 on the client side — meaning you’ll need to update every device that connects using the AmneziaWG 1.0 protocol.
If the server uses the AmneziaWG 2.0 protocol, you can change I1-I5 on the server side so any newly generated VPN configuration file will inherit the server settings. As a result, any device for which a VPN configuration is created will connect to the VPN with the server's protocol settings. If needed, you can also override these settings on the client.
Editing Server Settings
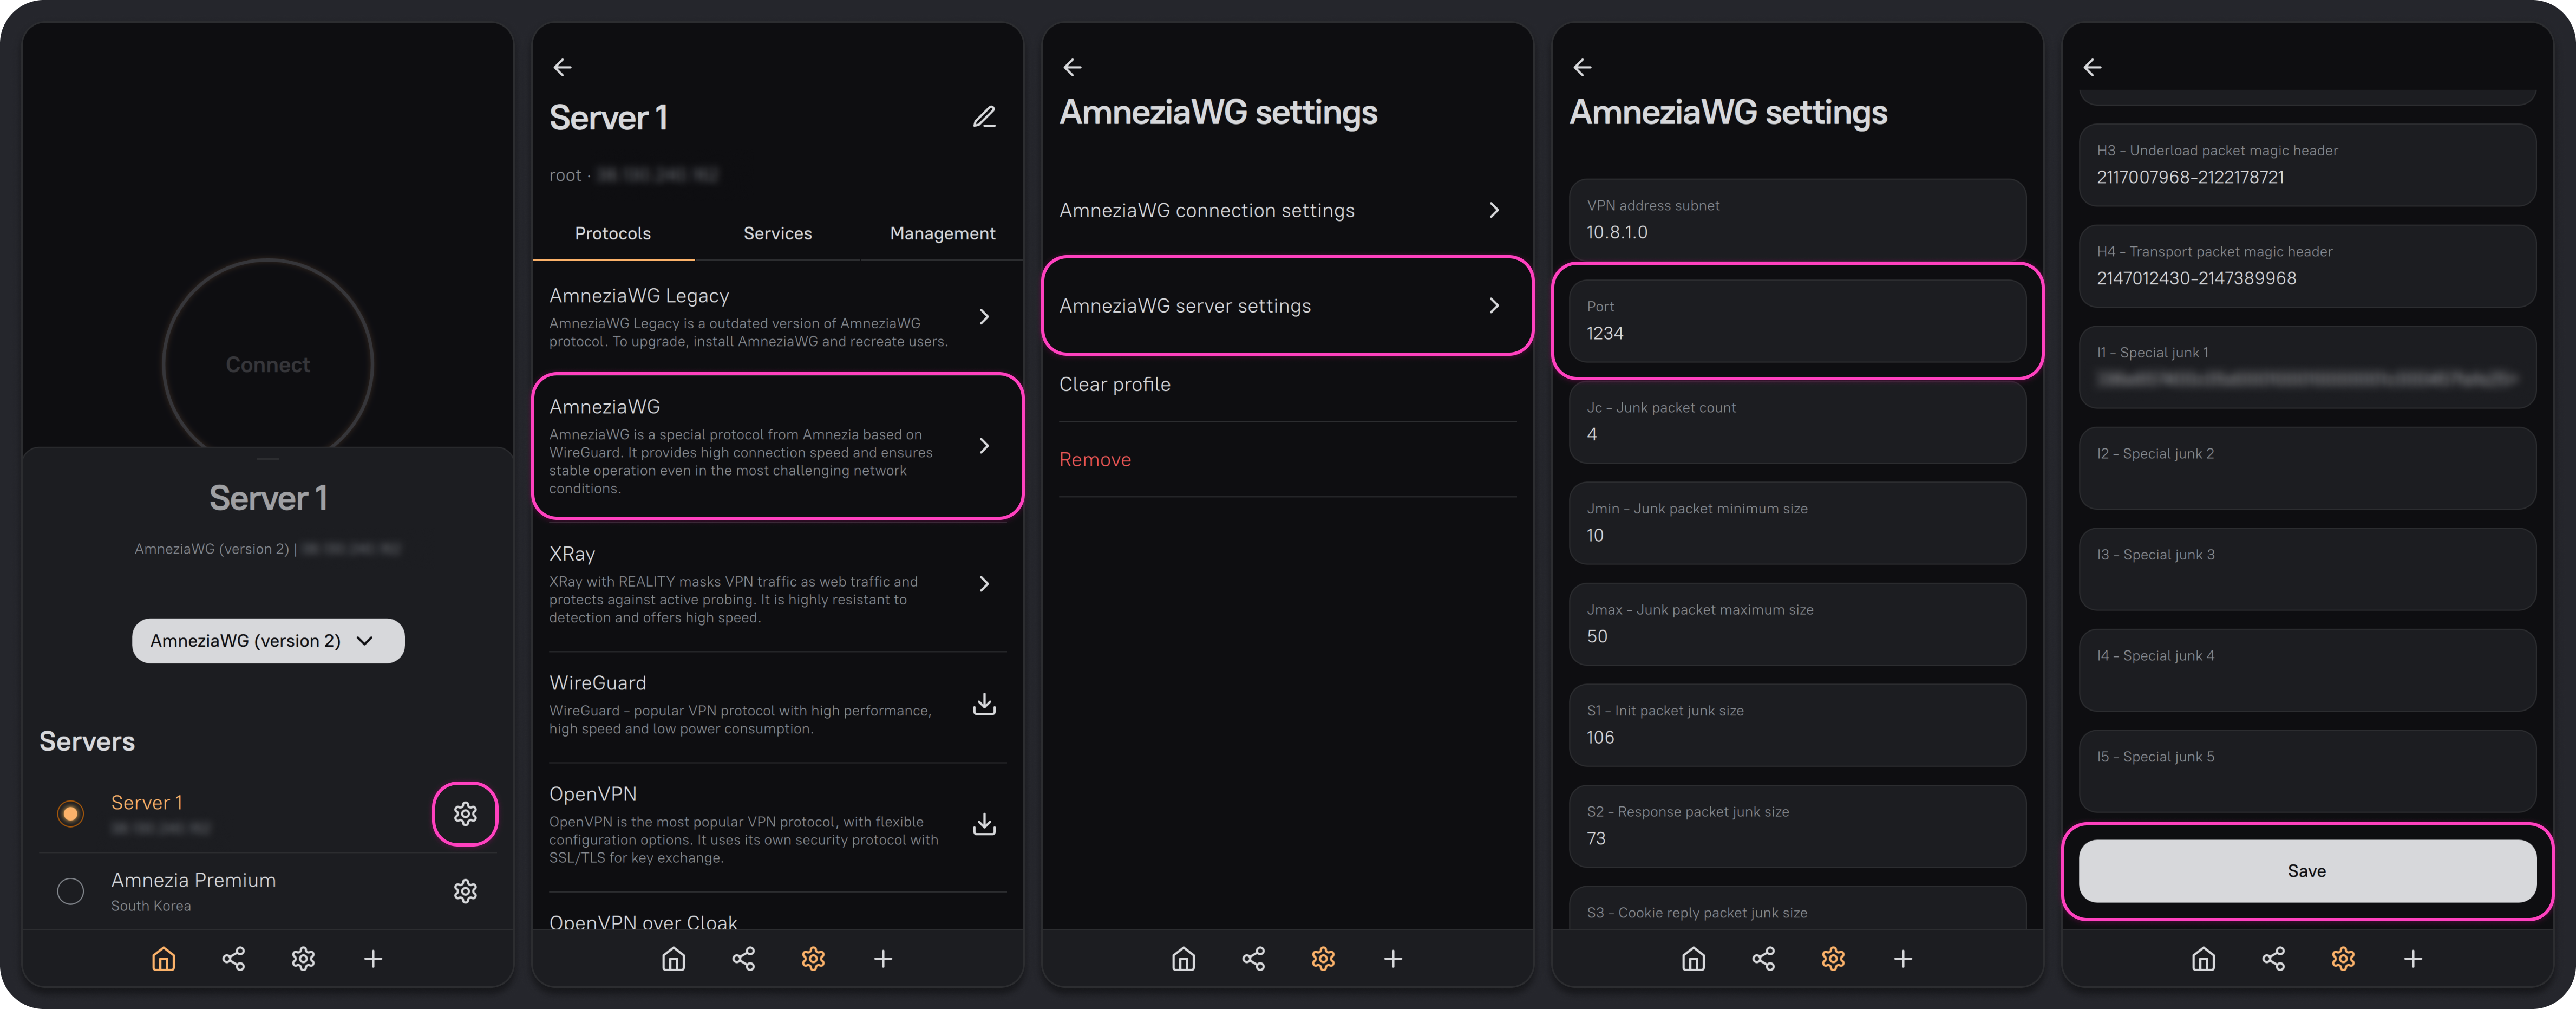
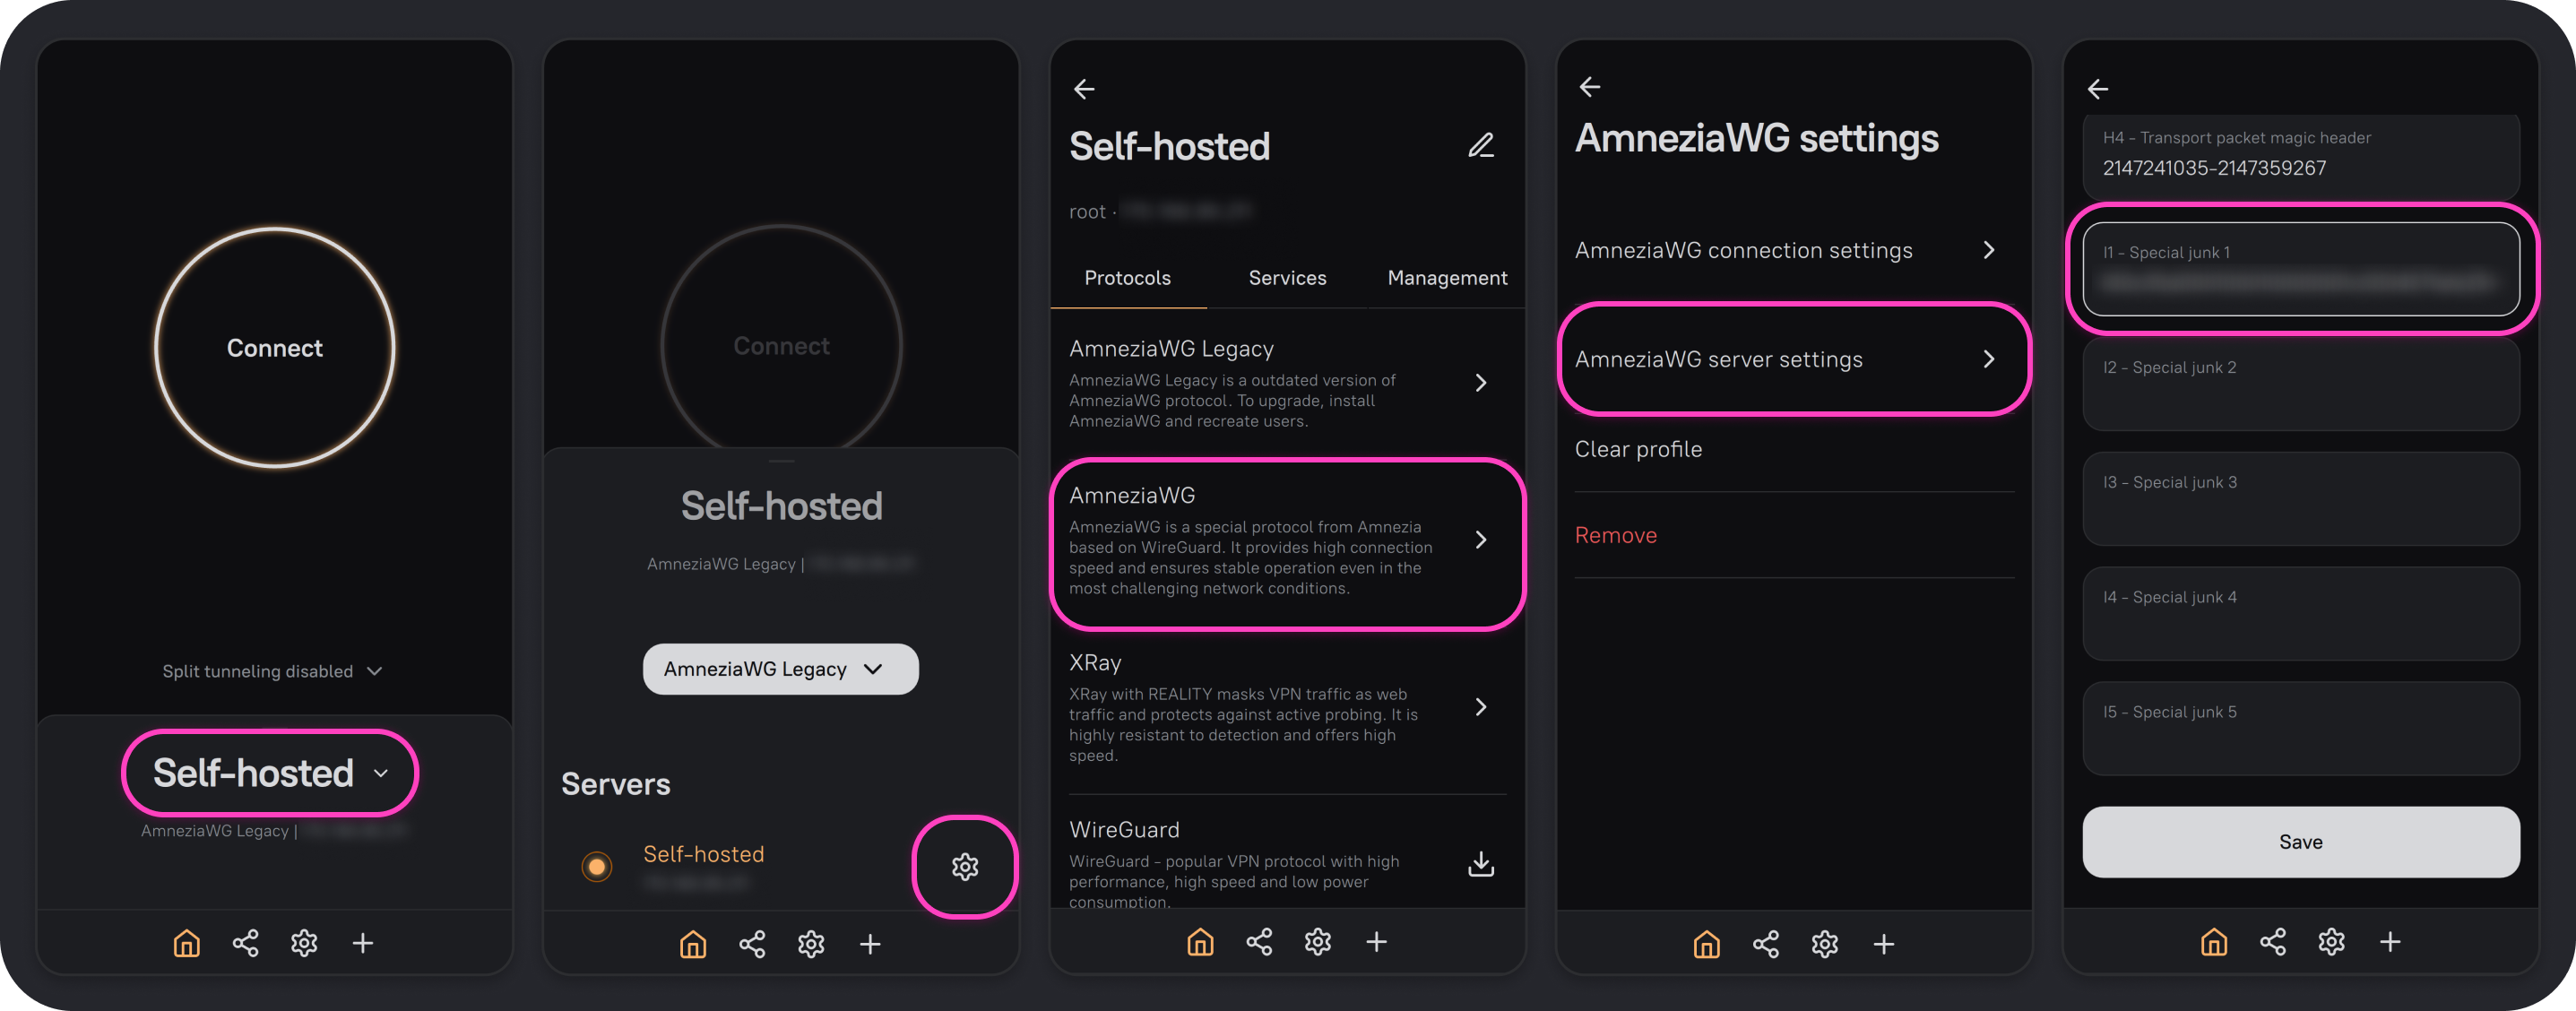
- Open the AmneziaVPN app and click any connection name.
- Click ⚙️ (gear icon) to the right of your server connection.
- From the list of installed protocols, select the AmneziaWG protocol, then open AmneziaWG server settings.
- Find I1 - Special junk 1, paste the formatted string
<b 0xHEX>, and click Save.
Now any newly generated VPN configuration file or key will use the chosen obfuscation.
Editing Connection Settings
- Open the AmneziaVPN app and click any connection name.
- Click ⚙️ (gear icon) to the right of your server connection.
- From the list of installed protocols, select AmneziaWG Legacy or AmneziaWG (depending on which protocol version you’re configuring), then open AmneziaWG connection settings.
- Find I1 - First special junk packet, paste the formatted string
<b 0xHEX>, and click Save.
This device will now connect to the VPN server with the chosen obfuscation.